Introduction: Should You DIY MacBook Screen Replacement?
When your MacBook screen cracks or stops displaying correctly, it feels like a disaster. Replacing it can be expensive, so many people wonder:
“Can I replace my own MacBook screen to save money?”
The short answer is yes, it’s possible—but it’s not as simple as swapping a phone screen.
MacBooks are precision-built devices. Attempting a DIY repair without knowing what you’re doing could make the damage worse, or even kill your laptop completely.
In this guide, we’ll break down:
- How MacBook screens are constructed
- What tools you’ll need to do it yourself
- The real difficulty level (not sugar-coated)
- Common DIY pitfalls people fall into
- The true cost comparison of DIY vs professional repair
- Why RepairX might still be the safer, more convenient option
Understanding MacBook Screen Construction: Why It’s Tricky
A MacBook screen isn’t just a piece of glass you pop off and replace.
It’s a layered display module, typically including:
- The LCD or Retina display panel
- Backlight layers for brightness
- Glass digitizer (in some models)
- True Tone sensors (for color calibration)
- Delicate flex cables & display connectors
On newer MacBook Pro and Air models, these parts are bonded together tightly. Even tiny mistakes—like pulling a flex cable too hard or failing to disconnect the battery first—can result in irreversible damage to the logic board.
Different models also have different complexity:
- MacBook Pro Retina: High risk. Tight assemblies, sensitive to damage.
- MacBook Air (non-Retina): Slightly easier, but still delicate.
- 2020+ MacBooks: Increasingly difficult with each iteration.
💡 Important: Unlike iPhones, MacBooks are not designed with “easy DIY” in mind. Apple expects screen replacements to be done by trained professionals.
Tools You’ll Need for DIY MacBook Screen Replacement
You can’t perform a proper MacBook screen replacement with generic screwdrivers.
Here’s what you’ll realistically need:
- Pentalobe Screwdrivers (P5, P6) — For opening MacBook chassis
- Torx Screwdrivers (T3, T5) — For internal screws
- Spudgers & Plastic Pry Tools — To lift connectors safely
- Suction Cups or Opening Picks — For separating screen glass
- Heat Gun / iOpener — To loosen adhesive bonds
- ESD-Safe Work Mat — Prevents static discharge
- Replacement Screen Assembly — Preferably OEM-equivalent (avoid cheap copies)
🛠️ Optional but recommended:
- Magnetic Project Mat (to keep screws organized)
- High-quality repair toolkit (e.g., iFixit Pro Tech Toolkit)
⚠️ Warning: Using cheap tools from Lazada or Shopee increases the chance of stripping screws, breaking connectors, or damaging the chassis finish.
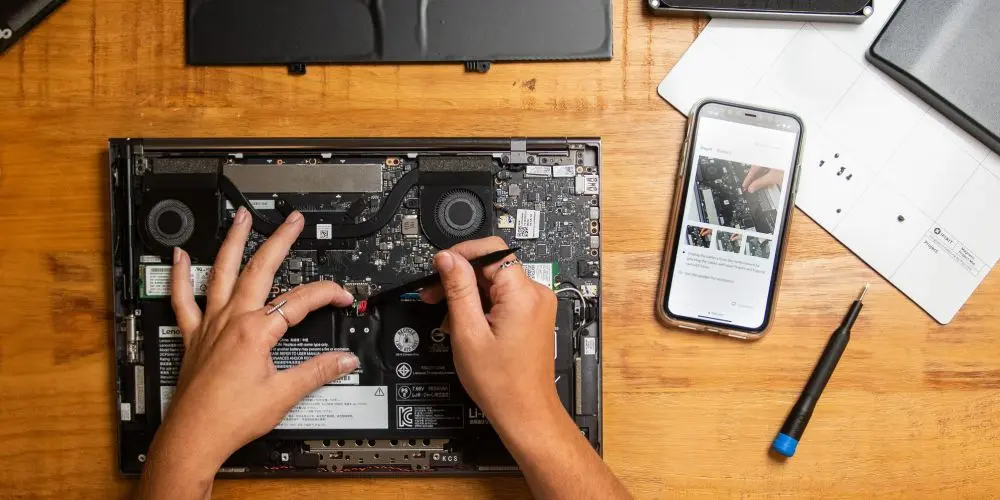
The DIY MacBook Screen Replacement Process: Step by Step

Here’s a realistic overview of what the process involves.
Note: This varies by model, but general steps are as follows:
1. Safety First: Power Down & Unplug
Always shut down your MacBook. Remove all peripherals and chargers.
2. Opening the Chassis
- Remove the bottom cover screws with a Pentalobe screwdriver.
- Gently lift the cover—this requires care to avoid bending or scratching.
3. Disconnecting the Battery
- Always disconnect the battery first to prevent accidental shorting.
- Use a spudger to carefully lift the battery connector.
4. Detaching the Damaged Screen
- Disconnect screen flex cables (they’re fragile—one wrong pull can tear them).
- Unscrew and remove the damaged display assembly.
- Depending on the model, you may need to apply heat to soften adhesives.
5. Installing the New Screen
- Align and connect the new screen.
- Reattach all flex cables with gentle pressure.
- Double-check cable seating to avoid display flickering or no signal.
6. Reassembly & Testing
- Reconnect the battery.
- Power on the MacBook to test the new screen before closing everything up.
- If display works correctly, close the bottom cover and secure all screws.
✅ At this point, success depends on precise handling and whether you used quality parts.
Risks of DIY MacBook Screen Replacement (Be Honest With Yourself)
Let’s be clear—DIY MacBook screen replacement is not for everyone. Common mistakes include:
- Tearing flex cables while disconnecting
- Shorting components by not disconnecting battery properly
- Damaging logic board connectors due to wrong tools or heavy-handedness
- Improper reassembly, causing loose screens or light leakage
- Buying low-quality aftermarket screens, resulting in color accuracy issues, True Tone problems, or outright failures
Worst case? You damage the logic board and the repair cost triples.
DIY vs Professional Repair: Real Cost & Risk Comparison
| Factor | DIY Repair | RepairX Professional Service |
|---|---|---|
| Cost | ~$300–$600 (parts + tools) | ~$500–$900 (inclusive, no risk) |
| Time Investment | 2–5 hours (including research & mistakes) | 1–2 days turnaround |
| Risk Level | High (zero experience = high chance of failure) | Very Low (done by experienced technicians) |
| Warranty | None (your own risk) | Warranty-covered repairs (up to 180 days) |
| Convenience | Hassle, requires careful work | Free doorstep pickup & delivery |
*Prices may vary from the time of writing, to get an accurate quote, please contact RepairX technicians.
For most people, the cost difference isn’t worth the risk. What you save in cash, you pay for in stress, time, and potential damage.
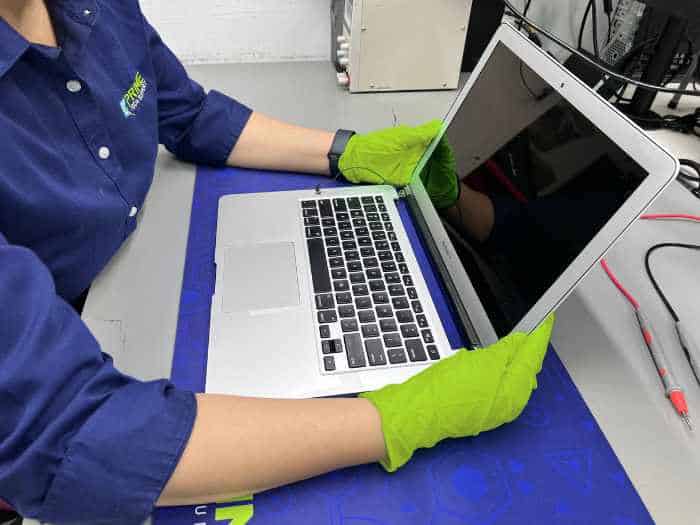
Why RepairX is the Safer Choice for MacBook Screen Replacement
At RepairX, we get it. You want value for your money—but you also want peace of mind.
Here’s why customers trust us:
- We use genuine or trusted OEM-equivalent screens—no low-grade knock-offs.
- Every repair is warranty-backed, so you’re covered.
- Enjoy free island-wide doorstep pickup & delivery—no need to visit us.
- Our technicians handle your MacBook with professional-grade tools and procedures.
- Transparent pricing. No hidden surprises.
You get professional results without the risk of DIY mishaps.
Conclusion: Should You DIY or Let Pros Handle It?
If you’re tech-savvy, patient, and willing to take a risk, DIY MacBook screen replacement is possible.
But be honest with yourself—are you ready to handle the delicate work and potential for expensive mistakes?
For most users, paying slightly more for a professional, hassle-free service like RepairX is the smarter choice.
You avoid stress, protect your device, and enjoy warranty-backed peace of mind.