A poor battery is a common problem that many MacBook users face after a few years of owning the notebook. You may notice that your MacBook requires constant charging or shuts down unexpectedly.
Before considering a full laptop replacement, following a reliable MacBook battery replacement guide can show you how replacing the internal battery is a much more cost-effective solution.
The good news is, there are plenty of options available—from DIY kits to professional services—to get your MacBook running like new again. This comprehensive MacBook battery replacement guide will walk you through your possibilities.
Understanding the Basics

What is MacBook Battery Replacement?
MacBook battery replacement is the process of removing your current battery and installing a new one in its place. This is often necessary when your existing battery no longer holds a sufficient charge or begins showing signs of malfunction. With the right tools and knowledge, it’s a manageable process that can restore your MacBook’s performance.
Common Reasons for MacBook Battery Replacement

There are several reasons why MacBook users might seek out a MacBook battery replacement guide:
- Reduced Battery Life: Over time, lithium-ion batteries degrade. Apple estimates that MacBook batteries are designed to retain up to 80% of their original capacity after 1000 full charge cycles. If you’re always near a charger, your battery might be due for replacement.
- Battery Health Issues: If your MacBook shuts down unexpectedly or displays a battery service warning in macOS, it’s a sign of deeper battery health problems. Swelling or bulging batteries are serious safety risks and require immediate replacement.
Methods for MacBook Battery Replacement

There are two main approaches to battery replacement: DIY and professional service. This MacBook battery replacement guide will help you explore the DIY route while highlighting when it’s better to let the experts step in.
MacBook Battery Replacement: Step-by-Step Guide
Before you dive in, follow these important preparation steps:
1. Identify Your MacBook Model
- Accessing Model Information: Click on the Apple menu in the top-left corner of your screen and select “About This Mac.” Here, you’ll find details like the model name, year, and serial number. This information is crucial as different MacBook models have varying internal layouts and battery types.
- Why It Matters: Knowing your exact model ensures you acquire the correct replacement battery and follow the appropriate disassembly procedures.
2. Back Up Your Data
- Using Time Machine: Connect an external storage device and set up Time Machine via System Preferences to create a comprehensive backup.
- Alternative Methods: Manually copy essential files to an external drive or utilize cloud storage services.
- Importance: While replacing the battery shouldn’t affect your data, it’s prudent to safeguard against unexpected issues.
3. Gather the Right Tools
- Screwdrivers: Most MacBook models require a P5 Pentalobe screwdriver to remove the bottom case. Additionally, T3, T4, or T5 Torx screwdrivers may be needed for internal components.
- Spudger Tool: A non-conductive tool used to safely disconnect battery connectors and pry components without causing damage.
- Replacement Battery: Purchase a battery compatible with your specific MacBook model from a reputable supplier.
- Additional Items: Anti-static wrist strap (to prevent static discharge), tweezers (for handling small components), and a suction handle (to assist in lifting the case) can also be beneficial.
4. Choose a Suitable Workspace
- Environment: Select a clean, well-lit, and static-free area. Avoid working on surfaces that can generate static electricity, such as carpets.
- Organization: Use a magnetic project mat or containers to keep track of screws and small parts, ensuring they return to their original positions during reassembly.
- Safety Precautions: Ensure the workspace is free from liquids and clutter. If possible, work in a room with minimal foot traffic to avoid interruptions.
Additional Recommendations:
- Drain the Battery: Before beginning the replacement, discharge your MacBook’s battery to below 10%. A charged lithium-ion battery can be hazardous if accidentally punctured.
- Consult Model-Specific Guides: Refer to detailed, model-specific disassembly guides or tutorials.
- Consider Professional Assistance: If you’re uncertain about performing the replacement, seeking help from a professional technician is advisable to prevent potential damage.
By adhering to these refined steps, you’ll be better prepared for a safe and successful MacBook battery replacement.
Replacement Process: MacBook Battery Replacement Guide
Here’s the core of your MacBook battery replacement guide:
Step 1: Power Down and Disconnect
Shut down your MacBook and unplug all cables. This step reduces the risk of shock or short circuits.
Step 2: Open the Back Case
Using your model-specific screwdrivers, remove the screws and carefully lift the bottom cover. Store screws safely in labeled containers.
Step 3: Disconnect the Battery
Locate the battery connector and use a plastic tool to gently detach it—never pull on the wires directly.
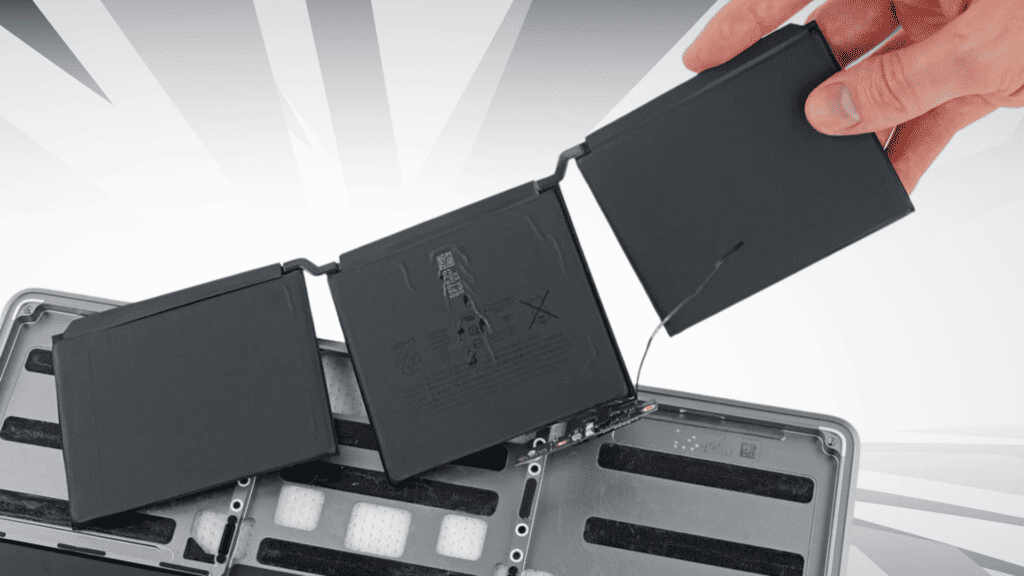
Step 4: Remove the Old Battery
Some batteries are screwed in; others are secured with adhesive. Follow your model’s guide to safely remove it.
Step 5: Install the New Battery
Align the new battery with the internal connectors and casing layout. Secure it with screws or place it onto the adhesive strips.
Step 6: Reconnect and Close
Reconnect the battery cable, reattach the back cover, and replace all screws.
Step 7: Power On and Test
Turn on your MacBook, check if the new battery is recognized, and monitor its charging status.
Important Safety Reminders
This MacBook battery replacement guide emphasizes safety:
- Avoid piercing or bending the battery during removal.
- If you notice bulging or fluid leakage, stop immediately and contact a professional.
- Always double-check connections before powering your MacBook back on.
If you’re hesitant or uncomfortable with any step, it’s always safer to consult a professional technician.
Ask for Professional Assistance
While this MacBook battery replacement guide is designed for confident DIY users, not everyone is comfortable opening their MacBook. That’s okay!
At RepairX.sg, our skilled technicians specialize in MacBook battery replacement using genuine parts and Apple-approved procedures. Whether you’re dealing with battery health warnings, performance drops, or swelling issues, we’ve got the tools and experience to fix it fast—so you don’t have to.
More Helpful MacBook Articles from RepairX
If you’re looking to dive deeper into MacBook care, here are more expert resources:
5 Common MacBook Issues and How to Fix Them Easily – RepairX Pte Ltd
MacBook Data Recovery: Essential Tips on How to Salvage Lost or Deleted Files 2024 – RepairX Pte Ltd
How-to | Prevent Scratches on Macbook Pro Retina Screen (repairx.sg)
Ultimate Guide to MacBook Screen Repair: Cost Breakdowns, Replacement Strategies, and Quick Fixes – RepairX Pte Ltd
Conclusion: MacBook Battery Replacement Guide for Beginners
Replacing a worn-out MacBook battery can significantly extend the life of your device—without breaking the bank. This detailed MacBook battery replacement guide covers every step, from preparation to safe installation. While DIY repairs can be empowering, safety is essential, and professional help is always a smart option when in doubt.
For peace of mind and expert care, trust RepairX.sg for all your MacBook repair needs.